13 · Updating the firmware
The firmware is the software running on your ESPuino. It's under continuous development – bugs get fixed, new features get added. So it's worth updating from time to time. This chapter shows you the ways to get there, from "nice and easy" to "full control".
There are essentially three routes, and for the vast majority of people the first two are the ones that matter: the firmware tool in the browser (over a USB cable) and the update via the web interface (over Wi-Fi). Only if you run your own, different hardware, or need special compile-time options, do you need to take the third route and compile the firmware yourself.
When an update is actually worthwhile
There's no blanket "always update". If your ESPuino runs happily, there's no obligation. An update is worthwhile if a specific bug bothering you has been fixed, or a new feature you want has been added. The best way to keep track of what's changed between versions is the changelog.
The most convenient way: the firmware tool in the browser
For the very first flash, or for recovery – say, if the web interface has become unreachable – the browser-based ESPuino Firmware Tool is the most convenient solution. You don't need to install any software for it; everything runs directly in the browser.
The tool can flash firmware (just the app, or a full flash), erase flash memory (i.e. reset the device to a clean state), display a serial console for troubleshooting, and also upload your own firmware. What's needed is a browser with Web Serial support (such as Chrome, Edge, Opera, Brave, or Vivaldi) and a USB connection to the ESPuino.
The process is straightforward: connect ESPuino via USB, choose the language and branch (master or dev) in the tool, select your board's platform, pick the firmware build you want, and set the USB speed (at most 460,800 baud). Then start the desired action, choose the serial port when prompted, and watch the progress.
Which branch to pick: master or dev?
- master is the stable branch – tested more thoroughly, but sometimes a bit older.
- dev is the development branch – always at the cutting edge, but less tested.
In practice, dev runs remarkably smoothly; the forum has jokingly said "dev is the better
master" more than once. If you want to play it safe, go with master; if you like the
newest features and fixes, dev is worth a try. 🙂
The right platform is critical
Be sure to pick exactly the platform that matches your board. The wrong platform can, in the worst case, damage the hardware.
The Wi-Fi route: updating in the web interface
If your ESPuino is already running and on Wi-Fi, an update also works entirely without USB – right in the web interface, in the Updates tab (chapter 8).
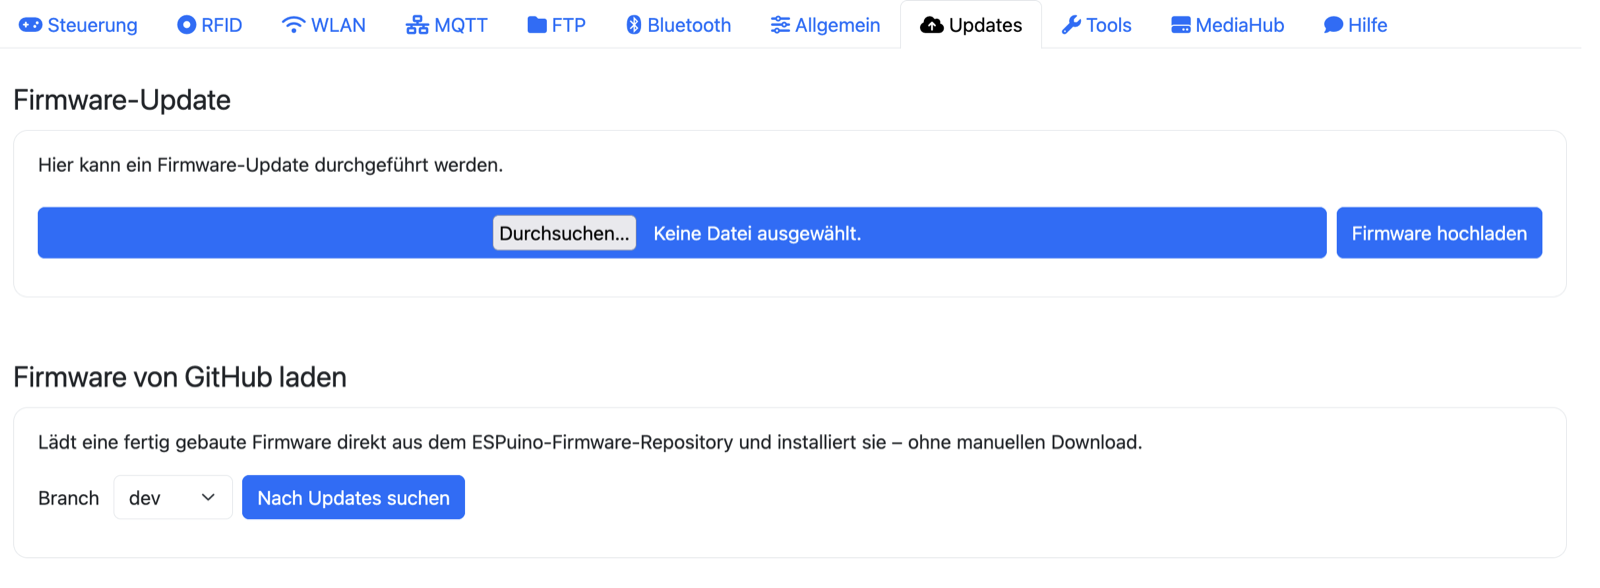
The most elegant option is load firmware from GitHub (forum #4582, German-language): you choose the branch (master or dev), click "check for updates", and get a list of the latest builds, each with date and commit ID (hover over the ID to see the associated change description). A click on "install" is all it takes – the matching board variant and language are chosen automatically. An interesting detail on the side: the actual download runs in the browser (via JavaScript), not on the ESP32 itself – again a matter of limited memory. Meanwhile, the Neopixel ring shows the flashing progress in blue.
Alternatively, in the same tab, you can also upload a firmware file (firmware.bin) manually.
Auto-detect makes choosing the file simpler
You used to have to watch out for the RFID variant in the file name when updating. Since May 2026, ESPuino detects the reader (RC522 or PN5180) automatically – so that pitfall is gone.
The advanced route: compiling it yourself
Sometimes the pre-built firmware isn't enough: you're running your own hardware, or you want to set an option that's only available at compile time (see chapter 14). In that case, you build the firmware yourself. The following process follows the forum guide #891 (German-language).
pioarduino instead of PlatformIO
The forum guide still talks about PlatformIO. By now, pioarduino is the better choice:
there's a dispute between Espressif (the maker of the ESP32) and the people behind PlatformIO,
which is why pioarduino – a community fork – supports Espressif's toolchains more up to date.
ESPuino's platformio.ini is already set up for it. Wherever "pioarduino" appears below, the
guide means what used to be PlatformIO.
Preparing
You need three things: Visual Studio Code, the pioarduino extension (installed in VS Code via the extensions marketplace), and Git. So Git can attribute your later commits, set up your identity once:
Getting and opening the repository
Clone the ESPuino repository and open the folder in VS Code:
In VS Code, this also works conveniently via Ctrl+Shift+P → "Git: Clone". Afterward, select
the environment matching your board in the status bar at the bottom – i.e. env:complete or
env:lolin_d32_pro_sdmmc_pe (mini4L).
Your own settings
If you want to change compile-time options, you don't do that directly in the shipped files, but in
your own settings-override.h (see chapter 14). That way, a later update won't
overwrite your customizations.
Building and flashing
In the pioarduino sidebar, choose "Upload and Monitor" – this compiles the firmware, flashes it over USB, and immediately opens the serial console.
Keeping up to date with Git
So you can pull in updates without breaking your own customizations, it's best to work on your
own branch instead of directly on dev or master. Set up once:
You now make your changes on MyDevice. To update, fetch the latest state of dev and rebase your
branch on top of it:
If you only have small, unimportant local changes, the simpler route via git stash also works:
git stash      # set your own changes aside
git pull       # fetch the update
git stash pop  # reapply your own changes
Don't commit directly to dev or master
Always keep your customizations on your own branch. If you commit directly to dev or
master, the next git pull will almost inevitably run into conflicts.
What ready-made firmware exists for
Ready-made firmware is automatically built for three targets – complete,
lolin_d32_pro_sdmmc_pe (mini4L), and lolin_d32_pro – each for the dev and
master branches and in three languages (DE/EN/FR). The current products are the
Complete and the mini4L; the lolin_d32_pro is an older board, for
which builds continue to be provided. For different self-built hardware, on the other hand,
there's nothing to simply flash – you need to compile it yourself. And the ESP32-S3 isn't
supported, because it doesn't have classic Bluetooth.